The best and most successful blogs are optimized for SEO. If you own a blog at WordPress and stuck on how to increase the blog traffic, then you are in the right place. This guide will help you to improve your blog traffic.
This guide will not teach you any cheats to rank your site in the top of search engine, but you will learn many best practices that will hopefully make it easier for search engines like “Google” to easily crawl and understand your website.
If anyone doesn’t have your blog, check out our free guide – How to Start a Blog
Yoast SEO:
Yoast SEO plugin is an essential plugin for WordPress sites. This plugin offers a lot of features. Some of the essential features are: –
- Meta tags optimization (Title and Description)
- SEO Analysis
- Readability Analysis
- Text link counter
- Generate sitemap
- Social media integration
- Pinterest verification.
- Meta control to all the pages and posts.
- Search console verification (Google, Yahoo, and Bing)
Yoast makes SEO simple and easy to optimize. Yoast has two plans – One is free, and another is a premium.
Free Yoast version offers:
- Optimizing title, description and URL slugs.
- Analysis of keyword usage.
- An internal links counter
- Readability checker
- Search Engine preview
- Focused Keyword
The premium version also offers:
- Multiple Keywords
- Internal linking suggestions
- Easy redirect manager
- Social media preview
- No Ads.
How to install Yoast on WordPress:
Once you’re ready with your blog, now the next step is to install the Yoast plugin on your WordPress blog.
If you don’t have Yoast plugin on your WordPress, then let’s get started from here,
The first step is to log in to your WordPress site and get into your dashboard.
Here, click on plugins menu >> Add new.
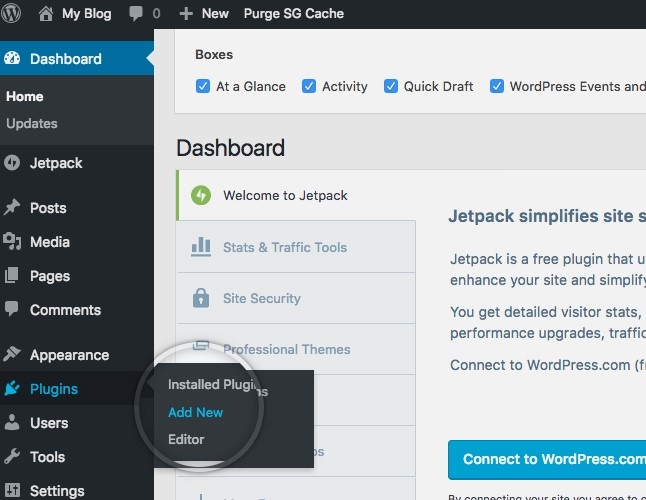
Next, type ‘Yoast SEO’ in the Search Box.

Click on the install button and activate the Yoast plugin.
After installing, you will find the Yoast SEO icon on the left side of your WordPress dashboard.
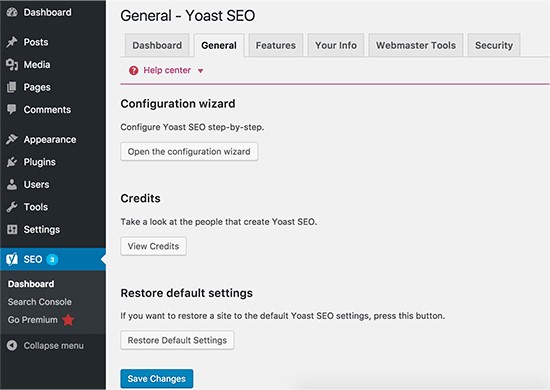
You are ready to go now!
Setting up the Yoast SEO plugin:
If you were already using the All-in-one SEO plugin or any other SEO plugin.
Don’t worry, Yoast makes it simple to import those settings into it.
Go to Yoast plugin and click on the tools.
Yoast SEO >> Tools.
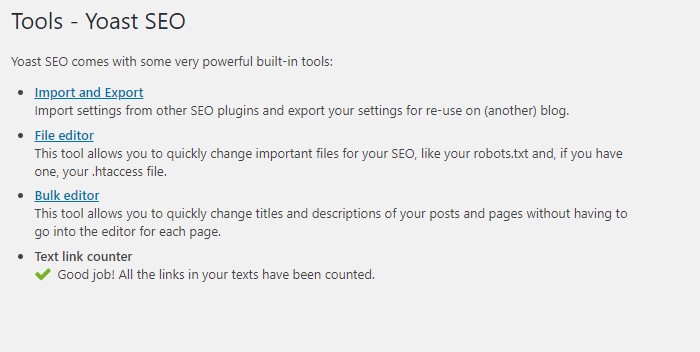
Now, click on ‘Import and export’ >> Import from other SEO plugins.
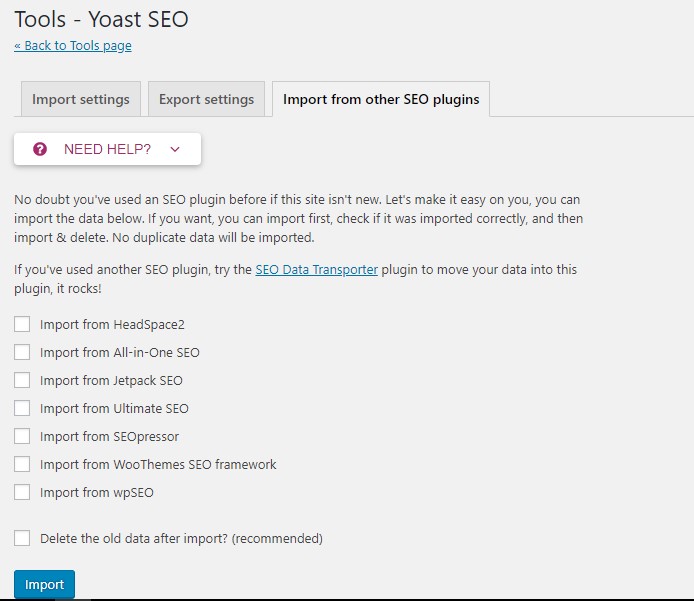
You can now import the settings from other plugins like Headspace2, All-in-one SEO, Jetpack SEO, Ultimate SEO, Seopressor, and wpSEO.
Check the box and click on the import button. Yoast will automatically install all your settings.
If you’re not using any SEO tool before, you can start from scratch here
First, click on the Yoast SEO; it will take you to the Yoast dashboard.
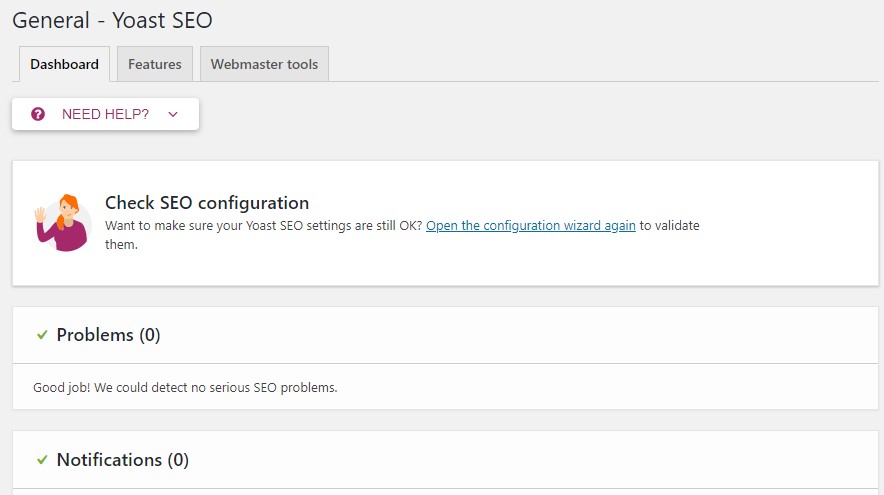
Next, click on the features tab.
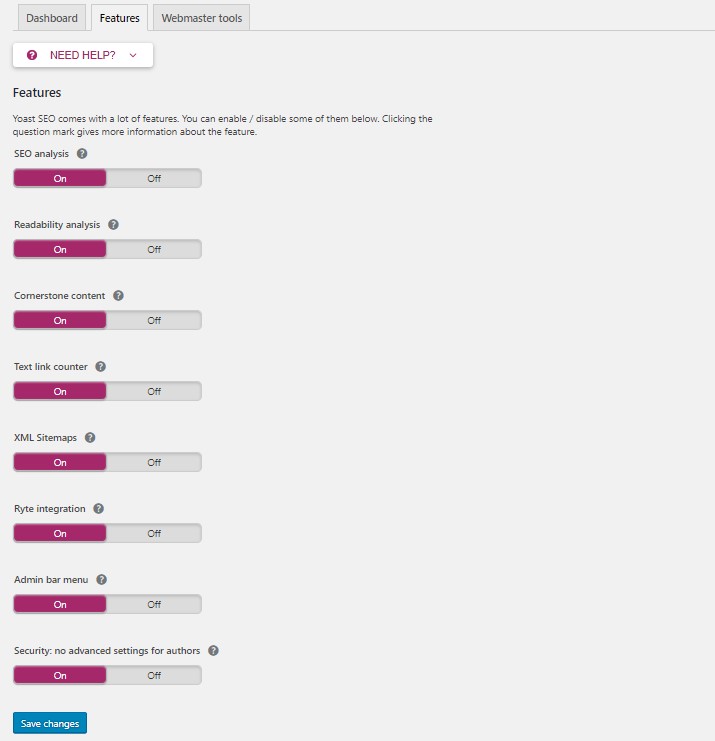
Yoast SEO comes with a lot of features. You can enable or disable some of the features here.
Next step is to submit your site to Google, Bing, and Yandex.
Click on the Webmaster tools tab to verify your website.
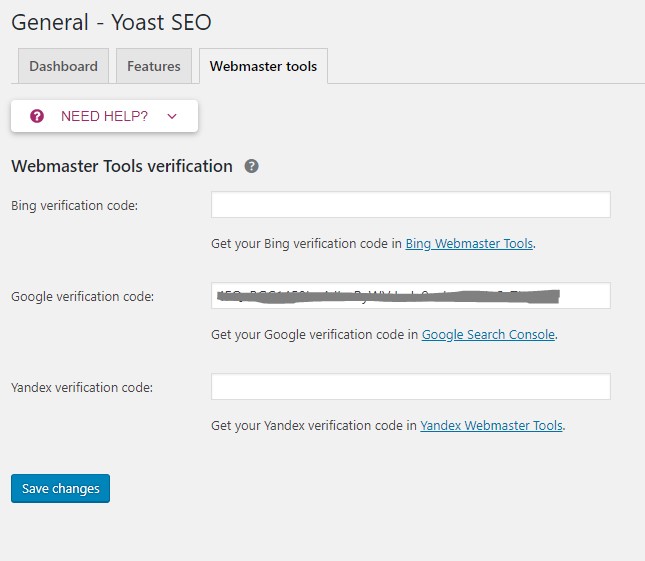
Here, get your search console verification code and paste it on the box or click on the link below the box ‘Bing webmaster tools or Google search console’ to get your verification code and click save changes.
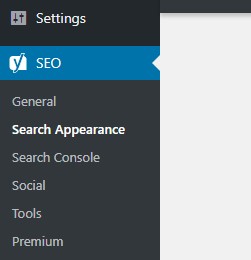
Once you have done configuring webmaster tools, click on the Yoast menu >> Search Appearance.
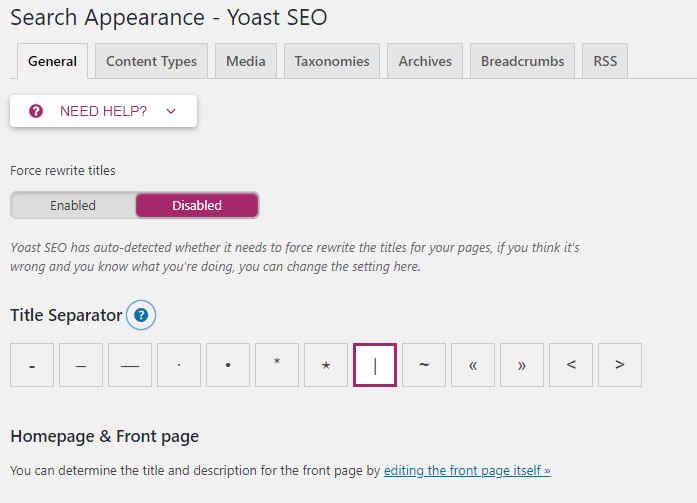
Here, you can able to select the symbol to use as your title separator.
For, e.g., How to install WordPress | Digitalotech or How to Install WordPress – Digitalotech.
You can choose as you need!
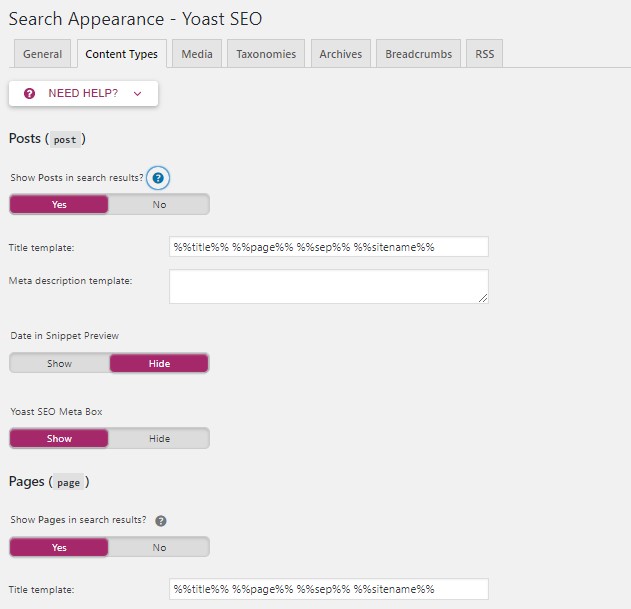
Next, click on the content types tab, here you can select the title templates for Pages and Posts. Also, you can enable or disable the page or post from indexing.
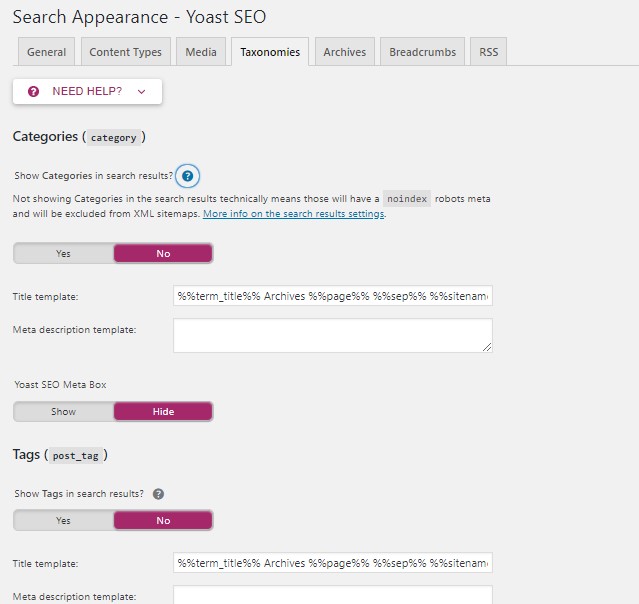
Next, click on the Taxonomies tab. Here you can see the categories and tags. You can enable and disable the categories and tags from indexing. If you disable indexing, then the page won’t show up in the search results.
If you need the categories to show on the search engines, then enable the index button.
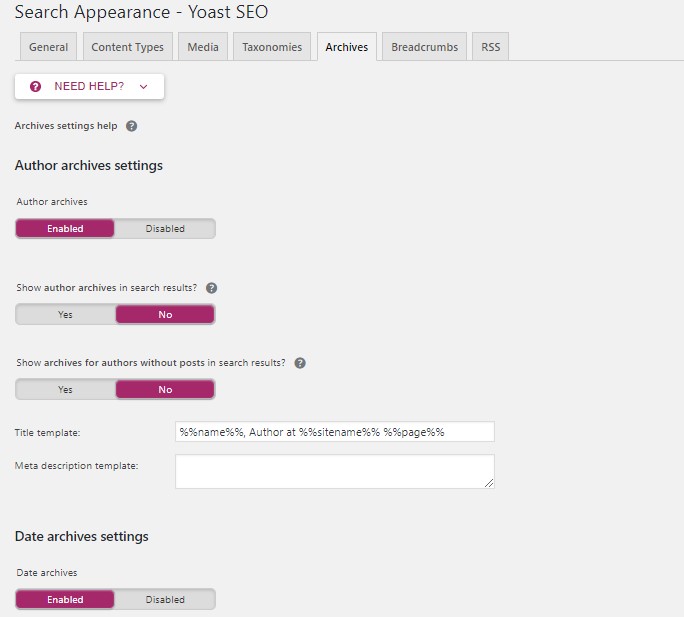
Next, click on the Archives tab. Here, you can enable or disable the index for Author archives and date archives.
Social media settings:
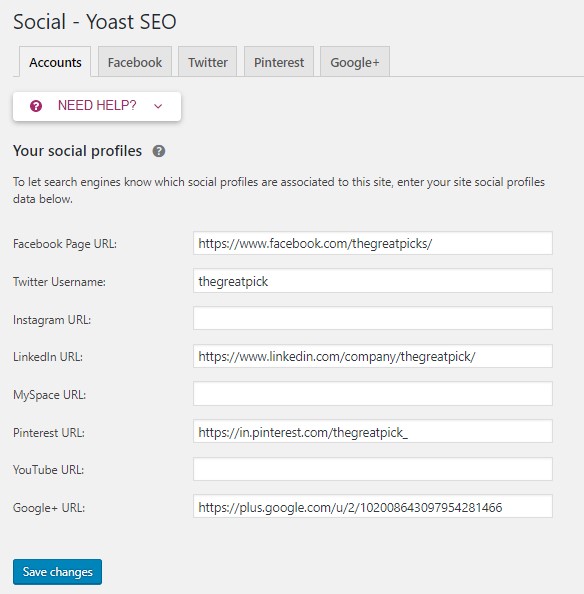
Yoast asks about your social media links. Add the social media profiles that you have. This will let the search engine know which social patterns are associated with your site.
You can use all your social media links to configure with the Yoast.
Now you have finished the Yoast SEO configuration setup.
How to use Yoast on pages/posts:
You can use the Yoast plugin for a page/post when you are publishing a new post/page.
Yoast helps to edit the title, description tags and also it shows the readability analysis of the post article.
You can see the Yoast settings on the bottom of the post, and you will see the Yoast SEO box like this,
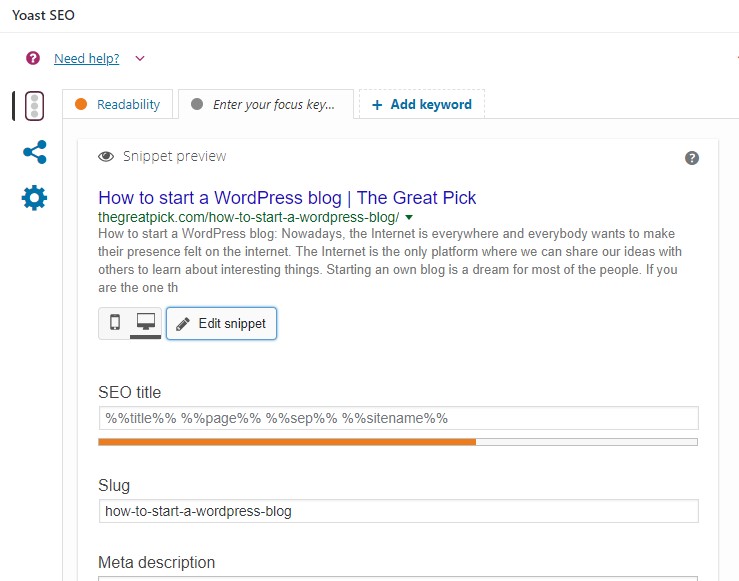
This is how your article looks like in the search results.
Here, you can edit the snippet. You can choose your SEO title, slug, and a description of this article.
You can also see the readability of your post content.
Next, click on the share icon on the left side
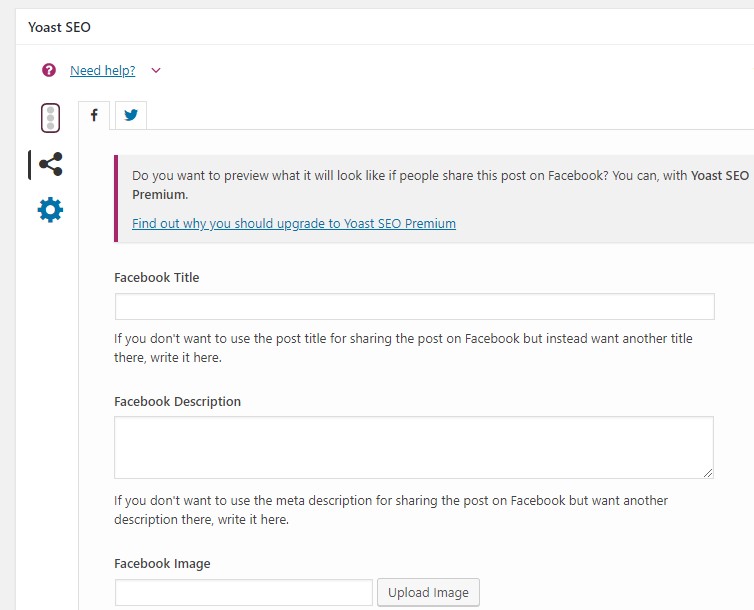
This will allow you to preview how your post will look on Facebook and Twitter.
Here, you can choose a different tile, description, and images only for social media shares.
The last icon on the left is advanced settings.
Here you can select the index option.
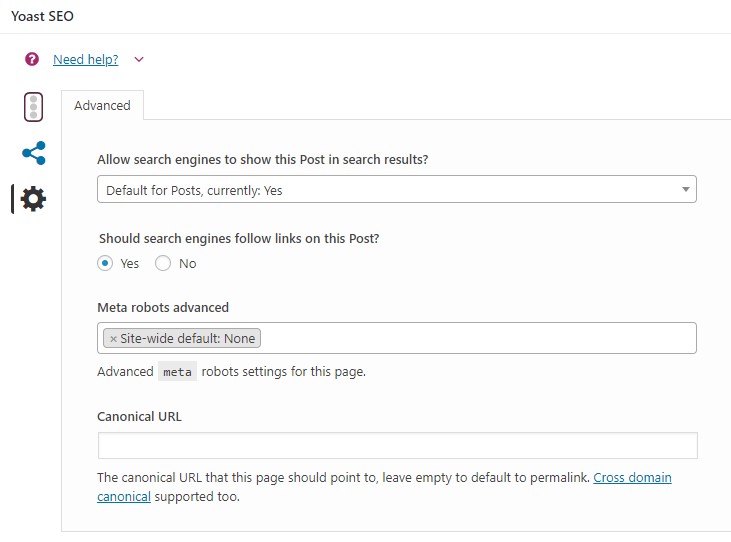
If you want the search engine to index your post, don’t change any settings. Keep it as it is.
If it’s any secured page or thank you page, then you don’t want the search engine to index, you can choose the no-index option from the first box.
Conclusion:
I highly recommend this plugin for all the WordPress users. I hope this post will help you to optimize and setup your Yoast SEO.
Explore this resource: Most essential SEO tools: Start your SEO with these tools